Are you driving, and do you have an OBD2 light? Come on? Have you ever found yourself driving and suddenly seeing that annoying check engine light come on?
Your car's way of telling you, "Hey, we have an issue here!" But before running to a mechanic for help, an OBD2 scanner could diagnose the issue! Here's a step-by-step guide on how to connect an OBD2 scanner to your car with ease and clarity.
What Is an OBD2 Scanner?

Let's first define the terms clearly. OBD stands for On-Board Diagnostics, and its second generation has been standard in cars since 1996. An OBD2 scanner reads trouble codes from your car's computer to give insight into any problems that might be occurring; think of it like using a doctor's stethoscope on your automobile!
Finding the OBD2 Port
Locating an OBD2 Port: Step one in finding your OBD2 port in your car involves finding where it can be found under the dashboard; usually, this can be challenging; here's how:
- Driver Side: The OBD2 port is often found under the driver's dashboard near the steering column. Get down on your knees and peek under your dash; usually, within arm's reach is where it should be found.
- Tips: If it is dark or difficult to see, use a flashlight. Sometimes, the port is concealed by a small panel that needs to be opened before accessing its contents.
- Locate it Near the Center Console: In some cars, OBD2 ports can be found near the center console; typically, this means they are hidden beneath a removable panel located just to the right or left of the driver's seat.
- Tips: If the object can't be located under the dash, try searching around where the console meets with the dashboard.
- Glove Compartment or Other Panels: If you are having difficulty, check if it might be in the glove compartment or behind other panels on the driver's side for your port. Although less likely, it could still be there, but checking can't hurt if this is the cause.
- Tips: Open the glove box and look for a removable cover inside. Additionally, some cars might feature panels along the dashboard or under the steering wheel that must be unbolted to access them.
- Use Your Manual: If you still have difficulty locating the OBD2 port, consult your vehicle's owner's manual. Most manuals contain diagrams showing exactly where the port can be found, which can save a great deal of guesswork!
- Tips: To find your port's exact location, consult your manual's troubleshooting or maintenance section. There, you should see an illustration showing its precise placement.
- Search the Web and Forums: Sometimes, an online search with your car's make and model can lead you in the right direction. Forums for owners can also be incredibly beneficial; other owners might have posted about issues related to their car that could help.
- Tips: Luckily, websites like YouTube offer video tutorials showing where to locate the port on any given car model.
Connecting the OBD2 Scanner
Before plugging in the scanner, ensure your car is off. Charging is different from charging your phone; this task needs more care.
Plugging in the Scanner: Connect your OBD2 scanner connector to its port using its 16-pin socket. This connector only fits one way, so if it does not slot easily, reverse its orientation and try again.
After connecting the scanner, turn the ignition to "On" without starting your engine. This activates the scanner, which can access and talk with the car's computer system.
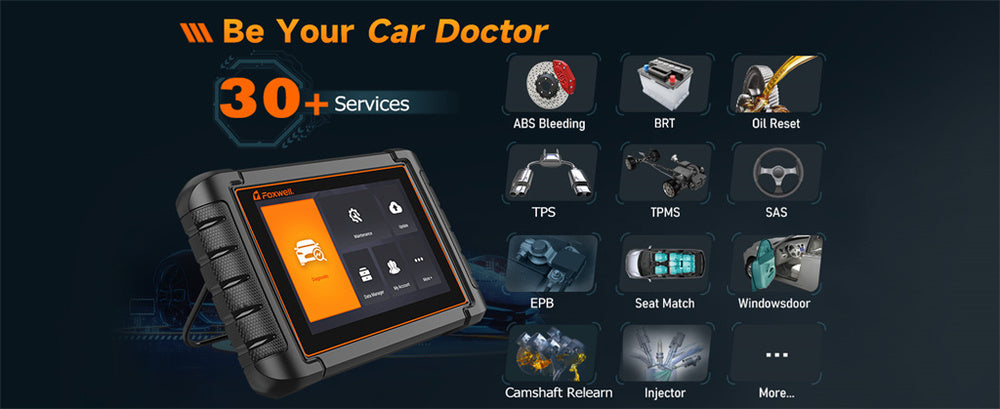
After your OBD2 scanner has been connected and your car's ignition turned on, it is time to use it and see what issues arise. Let's use the Foxwell NT809 as an example:
Power Up the Scanner: Once connected, the Foxwell NT809 should turn itself on automatically; if not, press its power button.
User-Friendly Interface: The Foxwell NT809 features an easy-to-read screen and intuitive menu design. To navigate through each menu item, simply use buttons or a touch screen. Don't get lost! It was designed with you in mind.
Select Diagnostic Option: On the Foxwell NT809's main menu, locate an option labeled "Diagnostic" or "Read Codes."
Read Codes: Select this option to read codes. Your scanner will connect with the computer in your car, communicating and displaying error codes; these codes contain letters and numbers telling us what's wrong.
Detail Information: The Foxwell NT809 takes it one step further by offering extensive details for every code detected. You receive not only the code itself but also a description of its cause—almost like having an in-house mechanic!
Foxwell NT809 provides users with live data and real-time information from your car's sensors that help give you insight into how it is performing now. This feature can help users gain a greater understanding of their car's current performance status.
Troubleshooting Tips
Connecting an OBD2 scanner should be straightforward, but occasionally, issues prevent this from happening smoothly. Here are some commonly experienced issues and how they may be solved:
Issue: After connecting the scanner, it has yet to turn on.
- Check the Connection: Ensure your OBD2 connector is securely plugged into its port; there should be no wiggling.
- Ignition Position: Check that your ignition switch is set to "On," as otherwise your scanner won't power on if no electricity is being supplied to its port from your car.
- Low or Dead Battery: If your car battery is low or dead, it could obstruct power from reaching the OBD2 port and affect the scanner's operation. In such an instance, try temporarily charging or switching power sources to ensure the proper functionality of OBD2.
No Trouble Codes Are Displayed
- Issue: Your scanner powers up, but no trouble codes appear even though the check engine light has been turned on.
- Drive Cycle: Your car's computer may require that it complete a diagnostic cycle. Drive your vehicle for about 20-30 minutes (a few trips or one or two outings) before checking back again.
- Compatibility: Check that your scanner is compatible with your car's make and model. While OBD2 is standardized, certain models perform better with certain brands than others.
- Reconnect: Simply unplugging and reconnecting the scanner can often solve an issue similar to turning it off and on again.
Clearing Codes, but Light Remains On
Once the problem has been addressed and cleared codes removed, but your check engine light remains illuminated, you may have more work ahead.
- Persistent Issue: Your problem might still need to be fully solved, causing the light to come back on if issues still need to be solved.
- Pending Codes: There could be unidentified codes that haven't been triggered yet but could soon be. Check your scanner menu for potential pending codes.
After clearing the codes, take your vehicle for an entire drive cycle (comprising city and highway driving) to reset its computer correctly.

Conclusion
Connecting an OBD2 scanner to your car is a straightforward process that can save both time and money by helping to diagnose any potential issues on its own. From basic scanners like the Foxwell NT809 to more sophisticated tools, these devices give an insight into your car's health while helping ensure it runs efficiently.
Learn to connect and use an OBD2 scanner so that you can take control of your car's maintenance, keeping track of potential issues before they arise and saving yourself from any delays! Happy diagnosing!
FAQs:
Where is the OBD2 port located in my car?
The OBD2 port is typically located under the dashboard near the steering wheel.
Do I need any special tools to connect an OBD2 scanner?
No special tools are needed; simply plug the OBD2 scanner into the port.
Can I use an OBD2 scanner with any car?
Most cars manufactured after 1996 are compatible with OBD2 scanners.
Leave a comment
This site is protected by hCaptcha and the hCaptcha Privacy Policy and Terms of Service apply.